On occasions, you Windows VPS or Dedicated server may become unresponsive through the standard Remote Desktop (RDP) connection & application. In this case, you can attempt to connect another way by using the UltraVNC viewer.
Once downloaded, follow these steps to install the viewer:
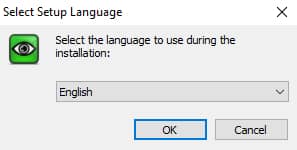
Double-click to launch the UltraVNC installer file. Select the appropriate language option and press the OK button.
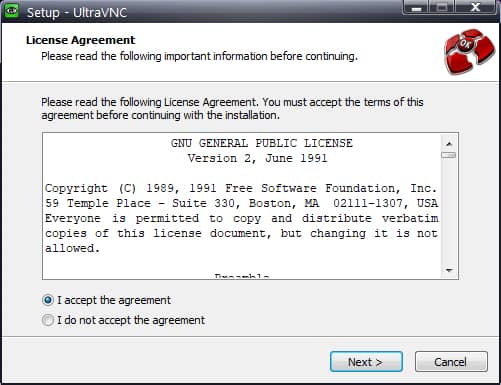
Select that you agree to the license and click the NEXT button.
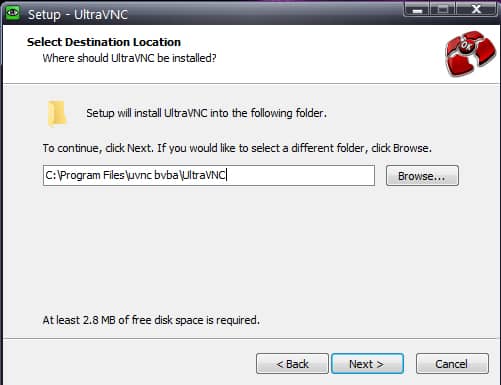
We recommend you accept the default install path (but you can change if you'd like). Press the NEXT button.
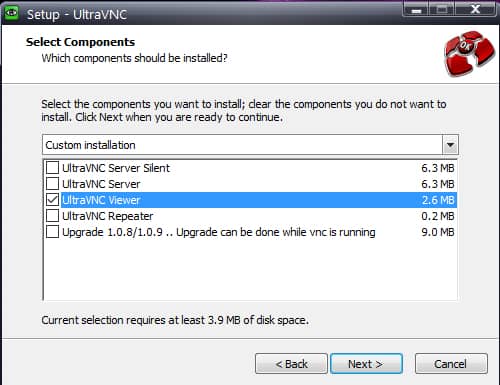
On the Select Components screen, you really only need to install the UltraVNC Viewer and can uncheck all other options (as in the image below). If however you want to keep the other components in the example of also remote controlling your current computer, you can select those as well. Click the NEXT button.
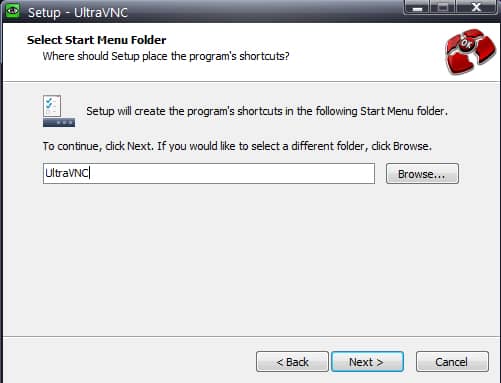
We recommend keeping the default Start Menu Folder name and clicking the NEXT button.
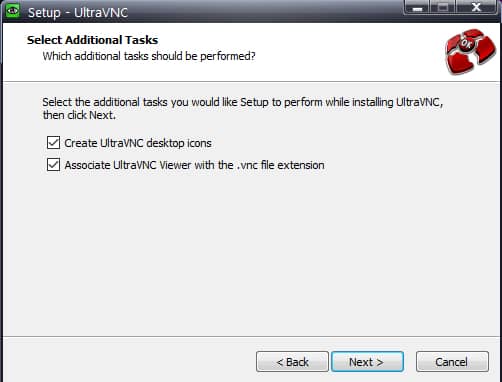
Check both options on the Select Additional Tools screen in order to create a desktop icon and associate .vnc file extensions to this program. Click the NEXT button.
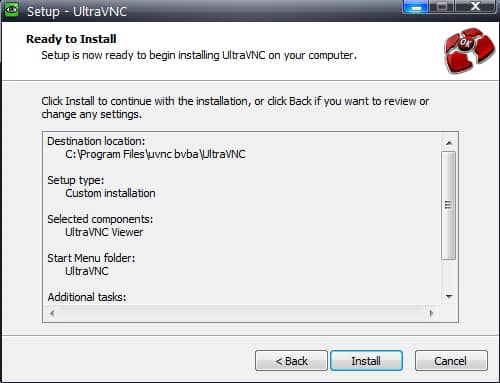
The last screen is simply to confirm all your previous option selections. Click the INSTALL button.
That's it. Once installed, you can click to open the UltraVNC viewer application and enter the full name of your VPS server (for example: 4010xxx.2surgehost.com) and the Administrator password you've already been provided with.
Overview
By default, our VPS servers are accessible to any IP address on the Internet. This allows you to login from any desktop, tablet, mobile phone, etc. Additionally it allows your employees, workers, virtual assistants, etc. to also access your VPS should you want them to.
However, there may be occasions when you want to limit access to only certain IP addresses or IP address ranges if you suspect a large number of malicious login attempts. Follow the steps below to enable this restriction.
Process
Remotely login to your VPS
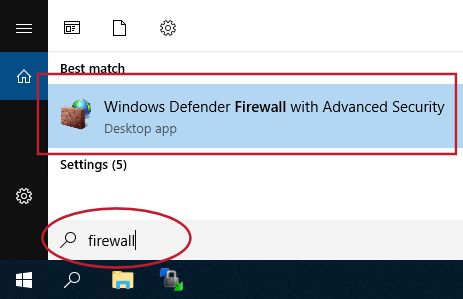
On the VPS desktop, click the SEARCH icon (magnifying glass icon) to the right of the START button and type Firewall
Next, click the Windows Defender Firewall with Advanced Security application in the results above to launch the program
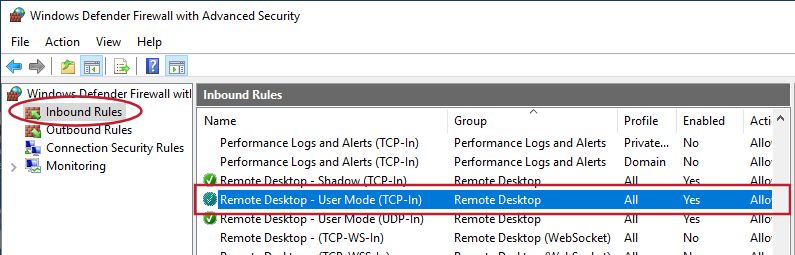
Click on Inbound Rules in the left pane, then dbl-click to edit the Remote Desktop - User Mode (TCP-In) rule
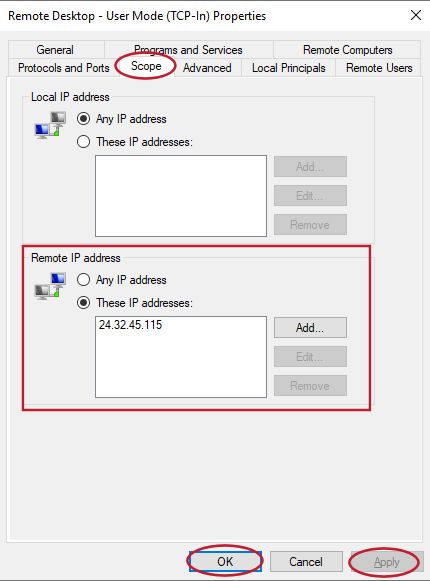
Click on the SCOPE tab and enter the SPECIFIC IPs or IP range(s) you want to limit inbound connections to in the Remote IP address section
NOTE: Its VERY IMPORTANT that you enter the public facing IP address of each workstation you want to access your VPS. Many workstations actually have a private IP address that's behind its Internet router... This IP address WILL NOT WORK. To find the publicly facing IP address of your workstation, just Google "Whats my IP address". That will give you the CORRECT IP address to enter.
Click the APPLY and then OK buttons and the new inbound connection restrictions will be immediately active.
That's it. You can now specifically control who accesses the login screen for your VPS by IP address or IP address range(s). This will also prevent your Event Viewer logs from filling with numerous malicious login attempts.gin attempts.
Issue
If you find your VPS becoming unresponsive and are unable to login normally using the RDP client of your workstation, it could be related to too many invalid login attempts in a short period of time. This type of attack may overwhelm the Remote Desktop Services subsystem of your server and lock it up preventing even valid authentications to the RDP desktop of the VPS. In this case, the only resolution is to reboot the VPS remotely in order to regain access to your VPS.
Why This Occurs
By default, our VPS servers are accessible to any valid, fully authenticated RDP connection over the Internet. This makes connecting remotely easy from ANY device you'd like (your dektop computer, laptop, mobile phone, etc.). All of these devices have their own unique IP address thus by NOT restricting access, you are able to connect from anywhere.
This unfettered access CAN cause an issue however if you find your VPS is under attack by malicious scripts that attempt to gain access to your server by attempting numerous login attempts in a short period of time. If this is the case, you will then want to restrict access to ONLY ALLOW SPECIFIC IP ADDRESSES to access your VPS, thus blocking all other attempts.
How To Determine If Your Server Is Receiving Numerous Invalid Login Attempts
The first step is to review your server's Event Log in order to find out if your server is indeed receiving multiple invalid login attempts. To do this, perform the following steps:
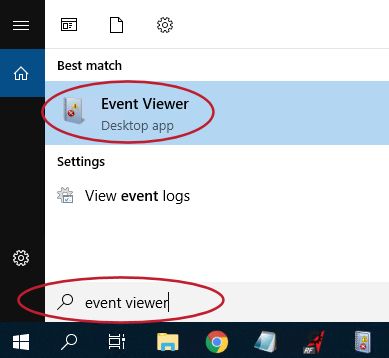
Click the SEARCH icon (magnifying glass icon) to the right of the START button and type Event Viewer
Next, click the Event Viewer application in the results above to launch the program
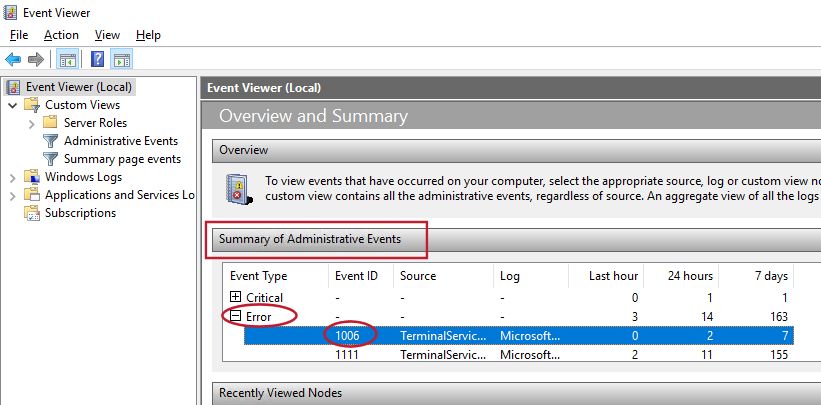
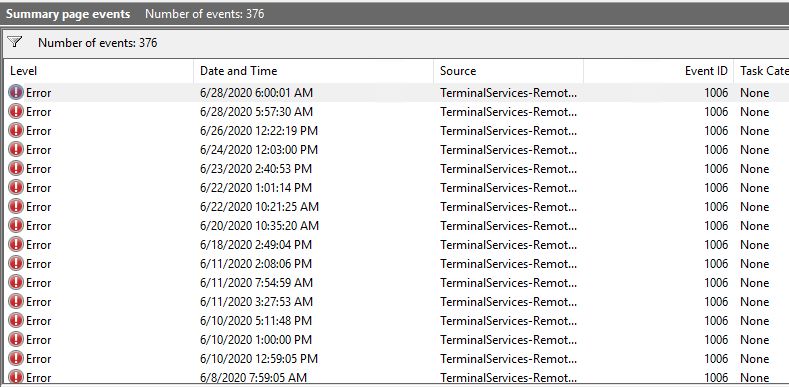
At the top of the Event Viewer, click to expand the ERROR messages under the Summary of Administrative Events section.
Look for any error messages with an Event ID of 1006. If you see one, double click it to see if there are a number of those events. These event log entries are the first sign that too many invalid login attempts may be occurring.
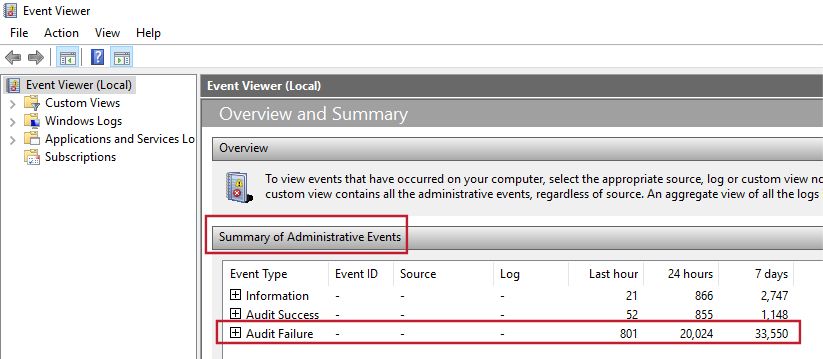
Next, we'll check the Event Viewer Audit Records for too many failed login attempts
Now scroll to the bottom of the Summary of Administrative Events section and review the number of Audit Failures that have occurred in the last hour, last 24 hours, and the last 7 days. If this number is much higher than what you would consider to be normal, then it is likely that your VPS is under some sort of login attempt hack most likely executed by a rogue login script or app on the Internet.
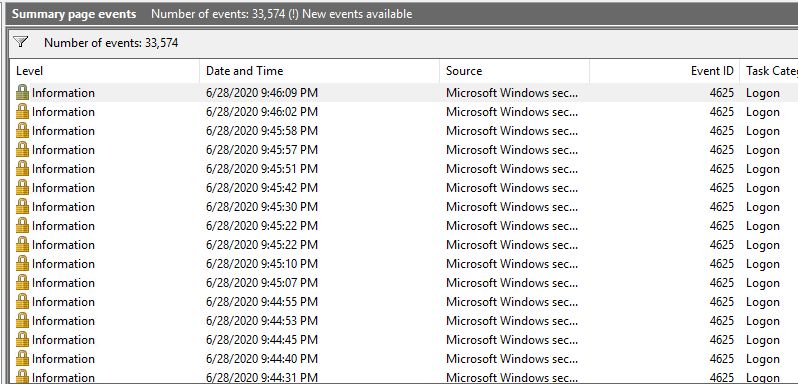
By expanding the Audit Failure section, you can review EACH of the individual login attempts. If you click the DETAILS tab of any one specific event, you can see the login name they attempted during login as well as the proxied IP address that was used.
As you can see in the Events logged above, the Invalid login attempts (error 4625) are occurring within a few seconds of each other. This is DEFINITELY a malicious attempt to gain access to the server.
In certain situations, you may have the need to reboot your Virtual Private Server (VPS) remotely. For example if the Remote Desktop of the VPS is frozen or hung and you have no other way of accessing the server, then a remote reboot would allow you to gain access to your VPS once again.
To support this functionality, we install OpenSSH server on all our Windows Virtual Private Servers. This allows you to connect remotely through SSH (also known as Secure Shell) and issue a reboot command.
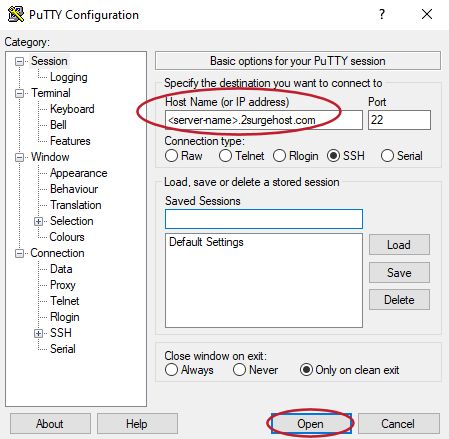
Open the SSH client (we will use Putty in our example) and type the name of your remote VPS in the host name line. Your VPS name is in the form of nnnnaaa.2surgehost.com where n = numbers and a = alphabetical characters.
Click the OPEN button.
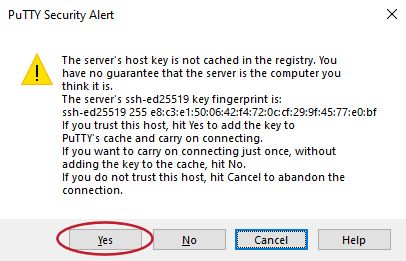
On the very FIRST time you connect to your VPS server, you will be prompted to add your VPS' public SSH key to your SSH client's cache. This ensures that the connection you are making is secured and that you trust the server is YOUR server. To accept the public key into your client's cache, click the YES button.Once you've added the public key into your cache, you will never be prompted for this again and subsequent SSH connection will go straight to the username / password prompt.
Once you are connected to the VPS's SSH server session, you will be prompted to enter your username and password.The username is: administrator
The password is the one you use to connect to your Remote Desktop sessions.
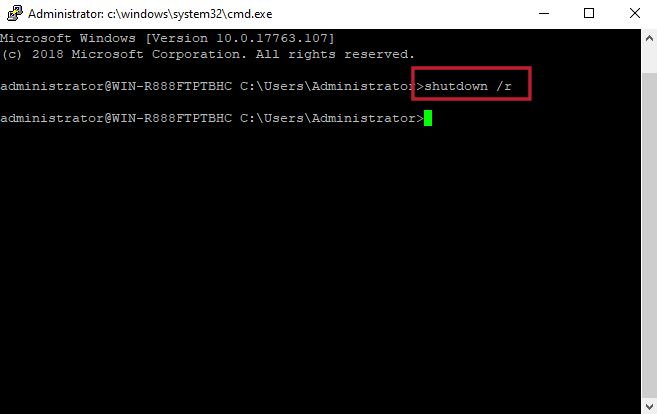
Once authenticated, you will see a prompt similar to the following:administrator@WIN-xxxxxxxxxx (where the x's are random alphanumeric characters)
To reboot your VPS, type the following command and press the ENTER key:shutdown /r
This will perform a proper OS level shutdown and reboot the VPS. To see even more command line options for the main shutdown command, type in shutdown /?
The shutdown process will begin in 60 seconds after you've entered the command. Once that occurs, give it another minute or 2 to reboot and you will then be able to access your VPS' desktop by using the RDP client in Windows.
Overview
In order to access your server's databases, follow these steps to log into PHPMyAdmin running on your server:
Login to the website Control Panel (Vesta CP):
CPanel: https://<servername>.2surgehost.com:8083
User: <provided to you>
Password: <provided to you>
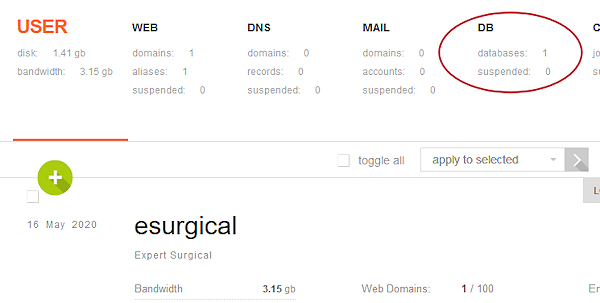
Next, click the DB menu link at the top:
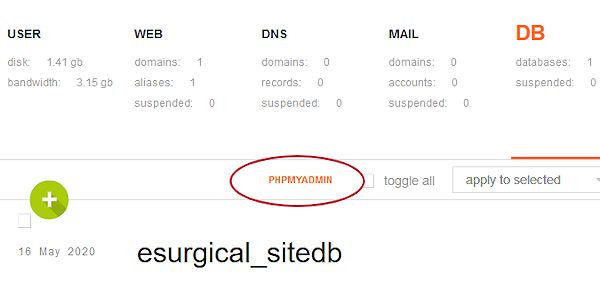
And then click the PHPMyAdmin link:
Lastly, you will need to authenticate using the Database admin credentials of:User: <provided to you>
Password: <provided to you>
Issue
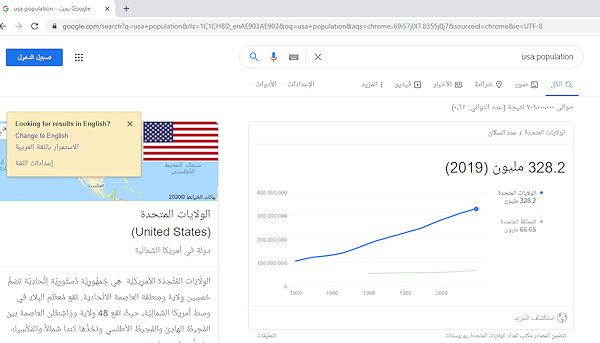
Whenever the Chrome browser history and/or cache is cleared, you will notice that the region settings for Chrome revert back to a default setting instead of the region in which you reside. Since most all of our Windows virtual private servers are located in European datacenters and you may be located in the US for example... this can cause your page text, search results, etc. to be displayed in a language other than English.
A search for "US Population" reverts to non-english setting
Why This Occurs
Unless you are logged into a Google account while using Chrome, the region settings are stored in the browser's cookies. Because of this, if you clear the cache and cookies in the browser, the SPECIFIC region setting (US for example) will revert back to Default (physical location of the VPS datacenter).
The exception to this is if you ARE logged into a Google account, then the regional settings associated to that account will be enabled and will roam with you to any computer you log into. These regional settings override the cookie based region settings.
How To Reset Browser Region Settings To Your Preferred Region
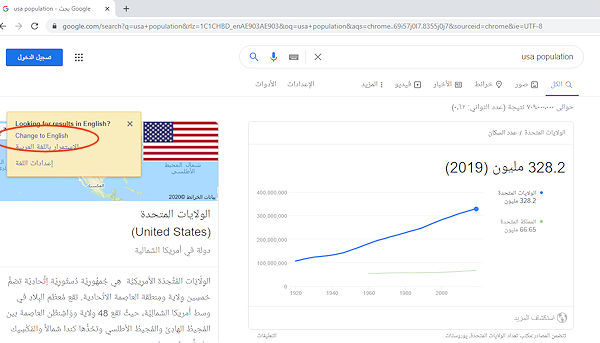
Perform a Google Search - When the results appear, you will see an option to Change To Your Preferred language... click on that link.
Change search results to English
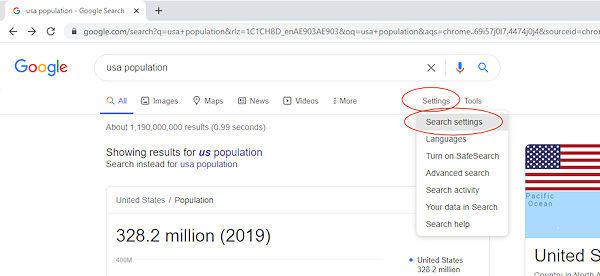
Adjust Search Settings - Click on Settings - Search Settngs
Adjusting Chrome search settings
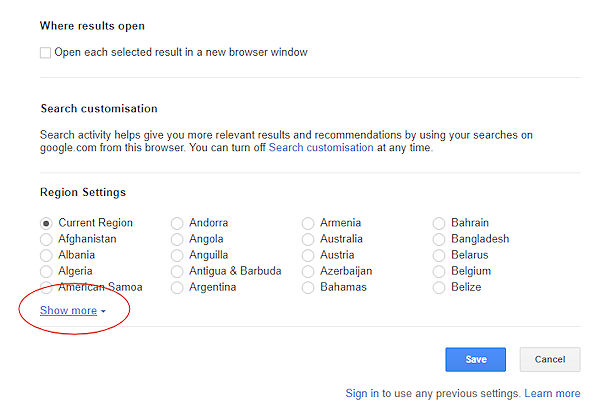
Expand Regional Options - Scroll down the Search Settings page until you see Region Settings. Next, click the Show More link.
Show additional regions
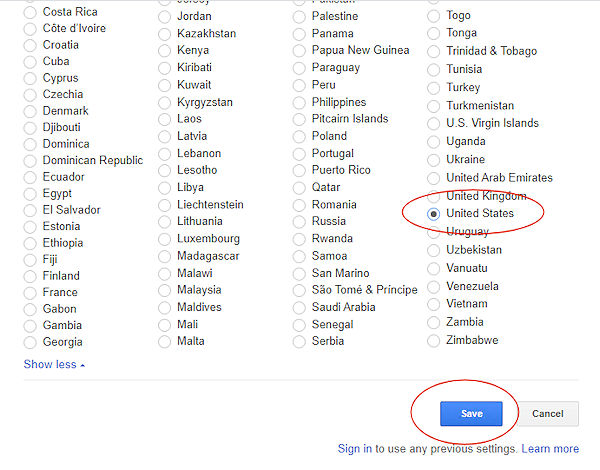
Select Preferred Region - Scroll down the list of regions and select your preferred region (we've selected United States in our example. Next, click the SAVE button.
Select preferred region and save
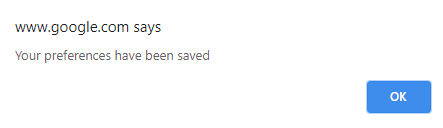
And You're Done! - You may see a pop-up message in your browser indicating the Region Setting change has been saved. Now, all your search results will appear in the language of your region setting.
Region settings have been saved
705 N Greenville Ave #600-102 Allen, Texas 75002 972-999-0309 info@2surgehost.com